I’ve spent years watching how small innovations in workshop technique translate into big gains in product quality and time savings. When a project calls for joining two boards end to end, the choice of method can change everything: strength, appearance, and the time you spend sanding or fixing gaps later. In this article I walk you through practical techniques pour joindre deux planches en bout, explain trade-offs, share measurable tips and real-world tricks, and give you resources so you can pick the right approach for your next build.
Why the joint matters: performance metrics to consider
Before diving into methods, I always ask three questions: how strong must the joint be, how visible can the seam be, and what equipment do I have? Measurable criteria help guide technique choice:
Overview of common methods
Here’s a quick map of options I use, ordered from simplest to most advanced:
- Butt joint with glue and clamps
- Butt joint with biscuits or splines
- Domino or dowel reinforced butt
- Scarf joint (angled end)
- Spline or keyed joint
- Finger (box) joint
- Plate or spline with metal joiners (flat plates, spline plates)
Technique details, pros and cons
I’ll examine the most practical choices for shop and site work.
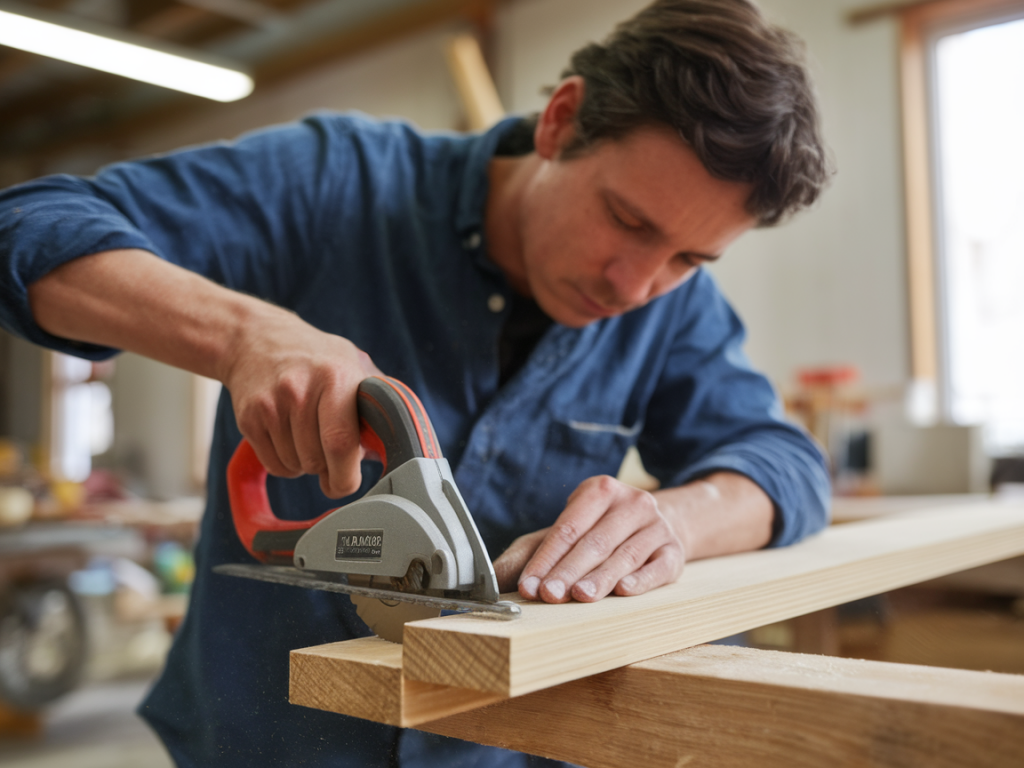
Butt joint with glue and clamps
What it is: plain end-to-end contact glued with PVA or polyurethane and clamped.
- Pros: Fast, minimal tooling.
- Cons: Low mechanical strength; depends almost entirely on adhesive and surface prep.
- Best for: Temporary fixtures, non-structural trim, or when a reinforcing method is planned later.
Biscuits, splines and splines-in-slot
Biscuits (Biscuit joiner) or longitudinal splines add alignment and shear resistance. I often use #20 biscuits for boards 18–30 mm thick.
- Pros: Good alignment, moderate strength boost, quick once jigged.
- Cons: Visible end-grain lines if not careful; requires joiner or table saw slotting.
- Tip: Use waterproof PVA for exterior work; orient biscuits centered on thickness to maximize shear area.
Dowels and Festool Domino
Dowels and loose tenon systems like the Festool Domino create a strong mechanical interlock. In tests, properly glued dowel joints can approach the strength of glued face joints.
- Pros: Very strong, precise alignment.
- Cons: Requires jigs or specialty tools; more material prep.
- Tip: Stagger dowel placement slightly off-center to avoid end grain tear-out during drilling; use epoxy in high-stress areas.
Scarf joints
A scarf joint uses complementary angled faces to increase gluing surface and distribute stress. I use a 1:8 (rise:thickness) scarf for long structural laminates and 1:12 where appearance matters.
- Pros: Excellent strength, very clean line when done accurately.
- Cons: More cutting and clamping complexity; needs precise alignment jigs.
- Statistic: A well-executed scarf offers 30–50% more gluing surface than a straight butt, significantly improving tensile performance.
Spline and keyed joints
Cut a groove across both board ends and insert a spline (wood strip) or a key. This is visually appealing and structurally sound for furniture edges.
- Pros: Good for aesthetics and alignment; spline can use contrasting wood.
- Cons: Visible line unless hidden; requires router/table saw work.
Finger (box) joints
Finger joints interlock multiple "fingers" for high tensile strength along the seam. They’re common in engineered lumber and long poles.
- Pros: Excellent gluing area and strength.
- Cons: Time-consuming and needs precise cutters jig.
Practical checklist before you join
- Surface preparation: plane or joint until mating faces are perfectly square and flat.
- Acclimate wood: let boards reach similar moisture content (±2% MC) to reduce future movement.
- Glue selection: use PVA for indoor, polyurethane for moist environments, epoxy for high-stress or gap-filling needs.
- Clamping plan: ensure even pressure; use cauls to avoid cupping.
Tools and materials I recommend
- Router with straight bit (for splines)
- Biscuits joiner (Lamello-style) or Festool Domino
- Pocket-hole jig for hidden mechanical reinforcement (Kreg)
- Quality PVA glue (Titebond III for waterproof option)
- Clamps: parallel-bar and strap clamps
Cost vs. performance table
| Method | Relative Cost | Strength | Time | Ideal Use |
|---|---|---|---|---|
| Butt + glue | Low | Low | Low | Non-structural, quick fixes |
| Biscuits/Spline | Low-Medium | Medium | Medium | Cabinetry, panels |
| Dowels/Domino | Medium-High | High | Medium | Furniture, load-bearing |
| Scarf | Medium | High | High | Structural laminates, visible joins |
| Finger | High | Very High | High | Long members, engineered wood |
Common problems and how I fix them
- Gap after clamping: Check for dust in joint; re-clamp with cauls and use gap-filling epoxy if needed.
- Twist or misalignment: Use alignment pins or temporary screws from the face (later concealed) to hold register.
- End grain swelling: Pre-seal end grain with thin glue to reduce absorbency differences.
Advanced tips from projects I've led
- For long tabletops I laminate multiple scarfed sections and add a central spline for torsional resistance.
- When working with exotic or oily woods, wipe joint faces with acetone or a sanding wipe to improve glue wetting.
- Use a sacrificial caul lined with wax paper under clamps to prevent glue squeeze-out bonding to clamps.
Further reading and sources
For deeper technical guidance and comparative testing, I lean on a mix of woodworking experts and material science resources:
- Popular Woodworking — practical tutorials and tests.
- Woodworking Network — trade articles and product tests.
- USDA Forest Products Laboratory — technical reports on adhesive performance and wood behavior.